This is a step-by-step guide for installing Joomla in CentOS server using DigitalOcean cloud hosting. You will be able to use this article as a reference to install Joomla by yourself in your CentOS server.
Joomla is a content management system that lets users develop fully-functional websites for publishing web content. It’s an open-source software which means that it is free to use. This also means that the source code can be modified according to the user’s requirement.
It offers proper permission management system. It also lets the user create, edit, archive, collaborating on data and information. Joomla can be built based on the design of the core functionalities. Moreover, the features can be enhanced with extensions and themes which are developed by Joomla developers and community. The power of Joomla’s application framework can be extended by the use of add-ons which makes it extensible.
Also, check out How to Automate Droplet Snapshot in DigitalOcean Server?
Joomla is designed in such a way that it is easy to install and set up with a short learning curve. However, its popularity is on the downside due to its stability and security issues. It doesn’t have a template directory like the WordPress CMS. Joomla CMS has such severe distinctions between its version. This makes upgrading between major versions hard and requires technical know-how to handle it properly.
How to Install Joomla in CentOS server – Step By Step Tutorial
Procedures to install Joomla
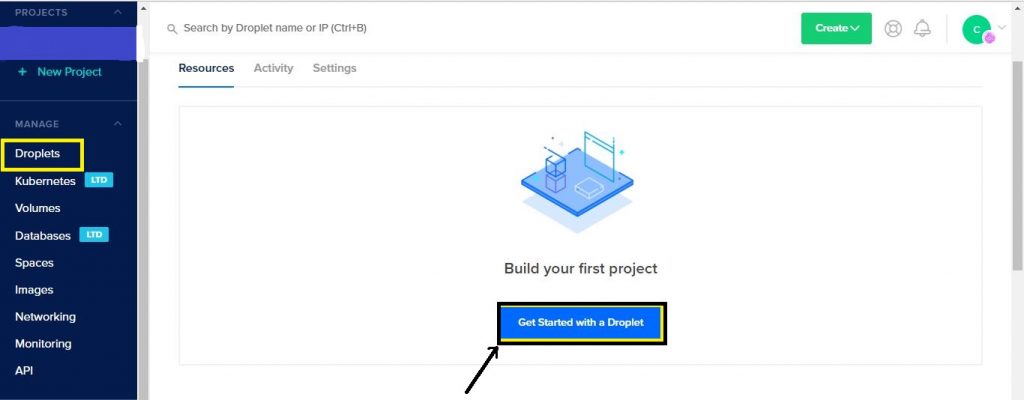
Step 1: Login to DigitalOcean
Login to the DigitalOcean admin panel by using your credentials and click on the Droplets on the left side menu. Now, create on “Create Droplet” as shown below.
Step 2: Select the Distribution
After clicking on Create Droplet in the next page, you can see the list of distributions provided by DigitalOcean such as Ubuntu, Fedora, CentOS, etc. Let CentOS version 7.5 be our choice for Joomla Installation
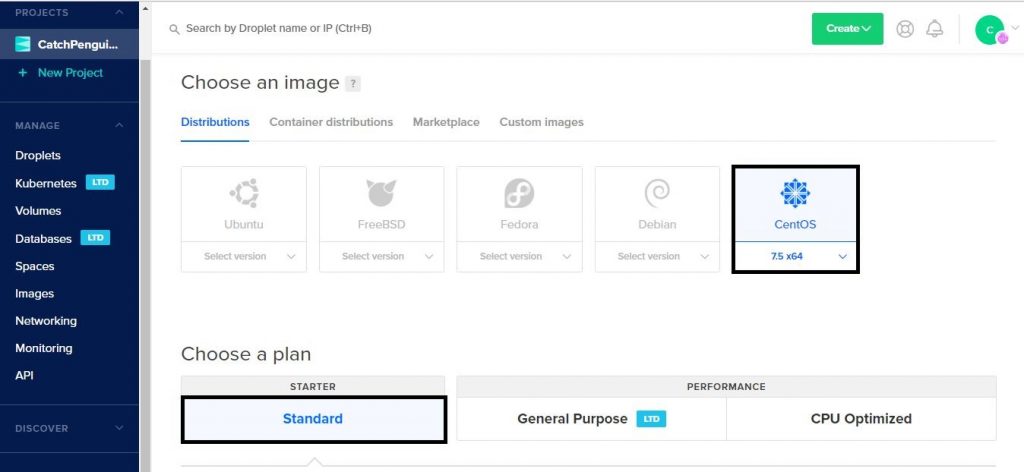
Step 3: Choose Plan and Backup Option
Next, choose your plan. You can choose Standard or General Purpose or CPU Optimised depending on your requirements of the site. Here we are choosing Standard type with a minimal configuration of $5/month with 25 GB disk space.
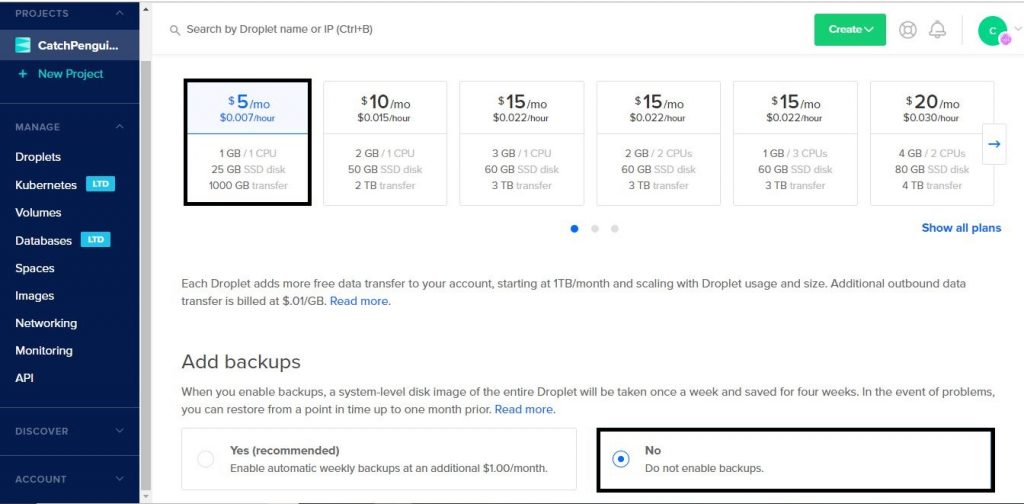
Step 4: Choose Plan and Backup Option
We can choose whether we need to Add backups for our server or not while launching the server itself. Snapshot of our server will be taken once a week and the snapshot will be maintained for a month. This feature is chargeable by DigitalOcean. In case of any problem. The user can easily restore our server from the snapshots. Here we skipped the backup option to ensure simplicity. To do so, choose “No” as shown in the image below.
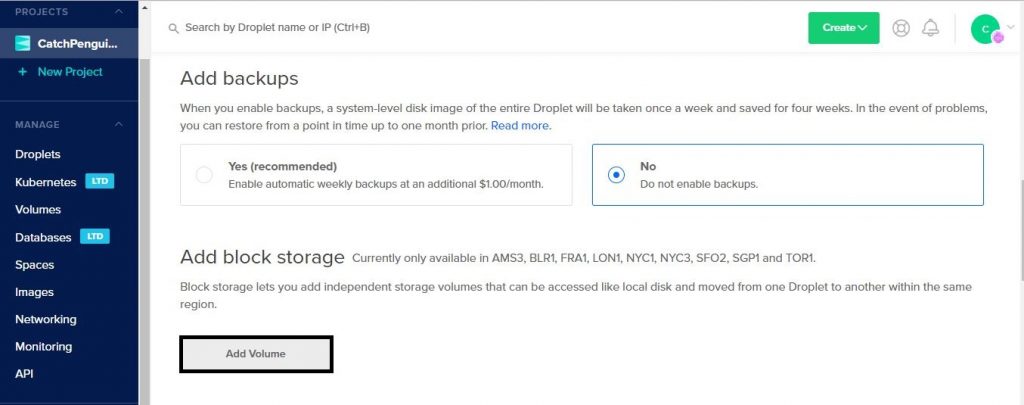

The volume of our server can be increased at any point in time by using the “Add Volume” option. This can also be done later on if the server requirements change or when there is a need for more volume.
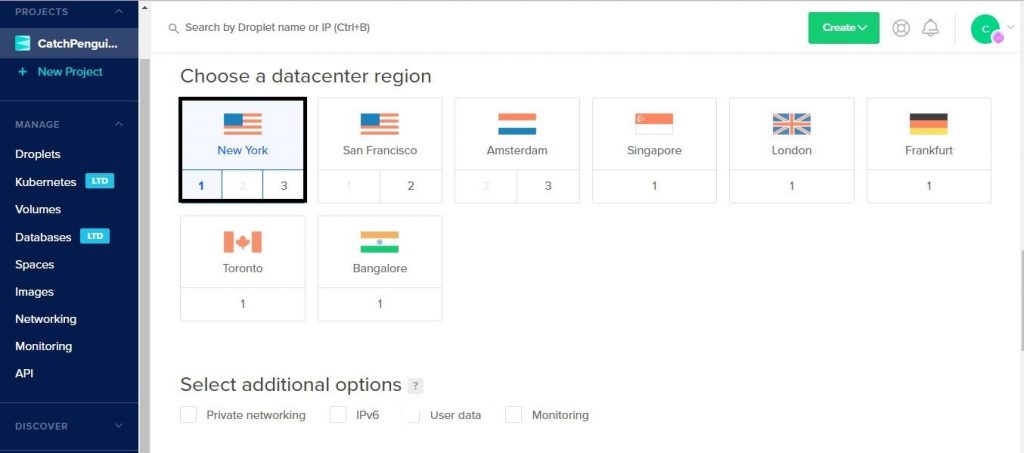
Step 5: Choose a Data Center Region
Now “Choose a data center region” based on the location of your potential customers. This will ensure that your server can process and serve information quickly. As of now, DigitalOcean is providing a set of eight datacenter regions. Here we are choosing New York datacenter region.
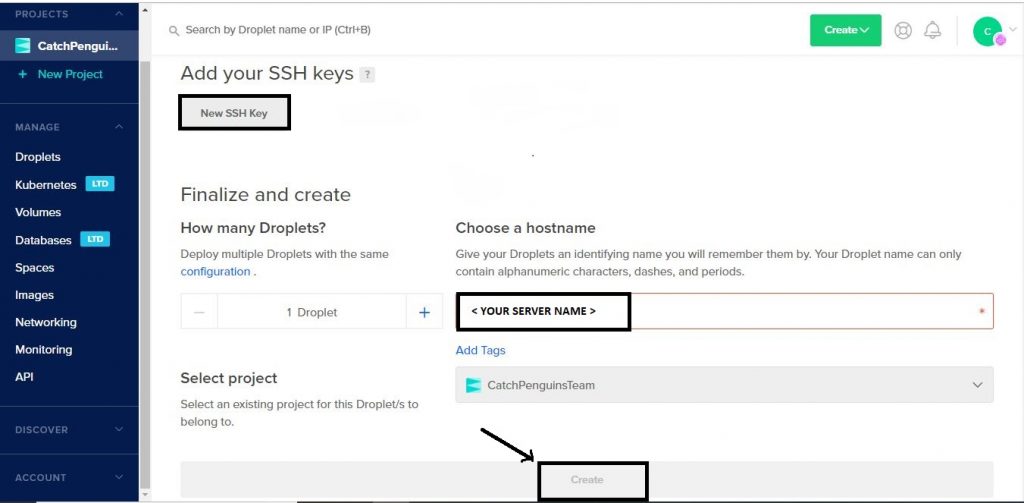
Step 6: Add New SSH Key
To access the server in CLI, we need to add our public key into the server. This can be used when launching the server itself so that you can launch your server easily. Click on add new SSH key and add our public key. Lastly, enter the name of your server and then click on the Create icon to deploy the Droplet.
Step 7: Login into Your Server
We can able to login to your server with the help of default public IP which is assigned to our server while launching itself. You can log in to the server using the following command
| ssh -i <private.key name> root@<Droplet Public IP> |
Step 8: Save Code for Joomla Installation
After logging into the server in CLI, now click on the below link or copy the link to the browser which provides you the codes for the Joomla installation. Copy the code and save into the CLI as per your wish. Let save it as joomla.sh.
| https://raw.githubusercontent.com/siru88/JoomlaOnCentOS7DigitalOcean/master/JoomlaCentOS7Install.sh |
Step 9: Run the Joomla Script
After copying the codes into our server we need to run the script by using the below command.
| sh joomla.sh |
The script will take some time to complete, and you need to be patient until the installation gets completed. Usually, it takes 5 to 10 minutes.
Step 10: Completing the Joomla Installation
Once the Joomla Installation is complete you can now access the site using the public address of our server in the browser
| https:// < your server public Address > |
Step 11: Important Files and Information
For the MySQL root login it will be placed in /root/.my.cnf and website’s database login credentials are placed in /home/centos/db-login.txt
Also, Web files are placed in /var/www/html and Joomla Admin details logins are placed under /home/centos/MagentoAdmin.Credentials
We have successfully installed Joomla in the CentOS server. So, what do you think about the tutorial? Are you going to use Joomla for your next project? If yes, why? Comment below and let us know.
If you have any questions related to Joomla or any other CMS server support, please write your comments. I will respond to all your questions.