
Git is an Open Source Version Control System developed by Linus Torvalds, the legend, who developed the Linux operating system kernel in the year 2005. Git is a tool that handles and manages the development project’s source code history with both speed and efficiency.
In this article, I’ll share my knowledge and experience with you to understand Git tool, how to set up a Github account, and steps for the installation and configuration of Git in Linux System. So, let’s start with how does the Git work!
Also Check: List of 7 Best DevOps Certifications
How does Git Work?
Git is a control system which is used as a content tracker, which means it is used to store the source codes of the same project developed by different developers. The source code stored in Git keeps on changing as many developers work on the project parallelly, the Git’s version control system enables us to manage the different versions of the code.
Git has two repositories – one is stored in a central server and another one in the developer’s machine. It’s a distributed version control system since the code is present in every developer’s system.
Live projects have multiple developers working in parallel so a version control system like Git is necessary to ensure that there are no code conflicts between the developers. If a developer wants to make changes to a project he needs to copy the whole repository to his system called forking. And then the changes made by him are replicated to the central server’s repository.
The central server’s repository is maintained in GitHub which is an online service which stores the codes pushed by the developers by Git. The repositories stored in the Github can be Cloned to any local system and the changes made by other developers can be pushed to the Github.
If needed, these changes are merged to the source codes which are present in other Github branches. Then he needs to send a Pull Request notification to the original owner. The owner, in turn, will review the codes and then, once he is satisfied, he will merge the changes to the repo.
Advantages of Using Git and GitHub
- It’s open-source with great community support.
- The contents of the files as well as the relationship between the files, directories, versions, tags and commits, all of these objects are secured cryptographically with the secure MHA1 hashing algorithm
- It’s flexible with various kinds of non-linear workflow environments
- It is efficient with both large and small projects
- It’s designed to support branches and tagging such that operations that affect branches and tags are also stored as a part of stored history
- It is designed with version control so that at any point of time, we can retrieve the older version
- It can be integrated with a number of third-party tools and services.
As a DevOps Engineer, it is important to be familiar with the Continuous Integration tools to enhance your skills. Check out these top Continuous Integration tools and get hands-on.
Steps for Installation and Configuration of Git in Linux System
So, we’ve gained enough information about Git. Now, we’ll learn how to install Git, setup GitHub account and then pushing the file from the local repository to the central Github’s repository. So, below are the steps for installation and configuration of Git in Linux system.
Step 1: Launching a Server
Launch a Server with any one of the Linux OS distributions such as AWS Linux, Centos, Ubuntu, etc. and then SSH into the server and then change into the root user.
Step 2: Installing Git
Install Git into the server after SSH into the server switch to root user and then run the following command.
For AWS Linux and CentOs
# yum install git -y
|
For Ubuntu
# apt-get install git
|
Step 3: Creating a GitHub Account
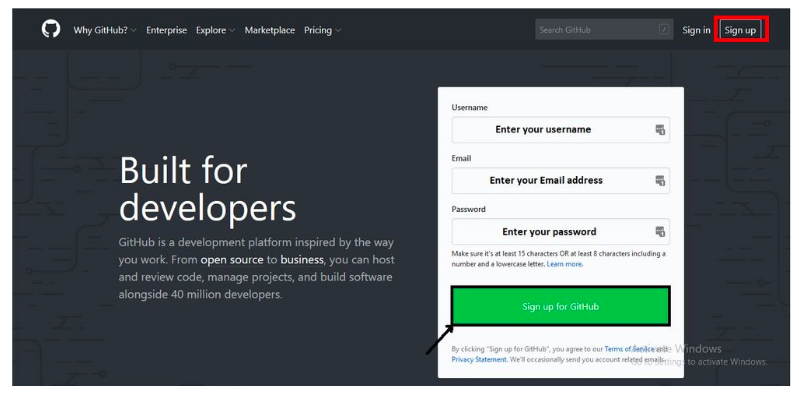
Create a GitHub account by clicking the following link https://github.com/. Click on SignUp and enter the required details as shown in the below screenshot and click on Sign Up for GitHub. If you already have an account click on sign in and provide the credentials, and then enter into the GitHub account.
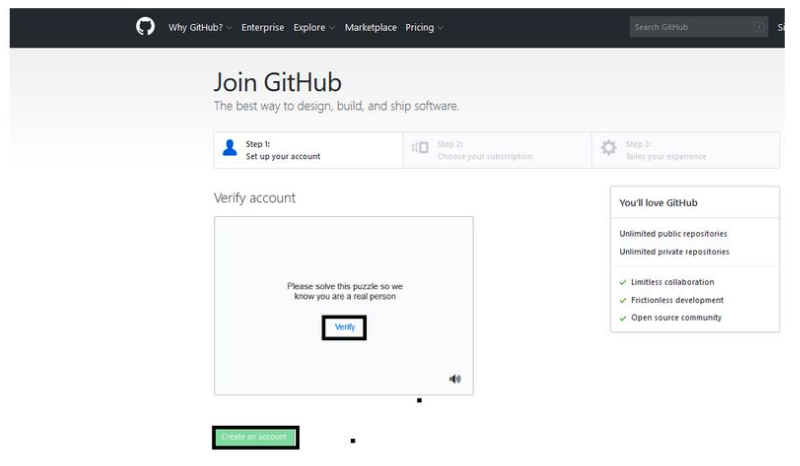
We need to Verify the account to SignUp. so, verify and then click on Create an Account.
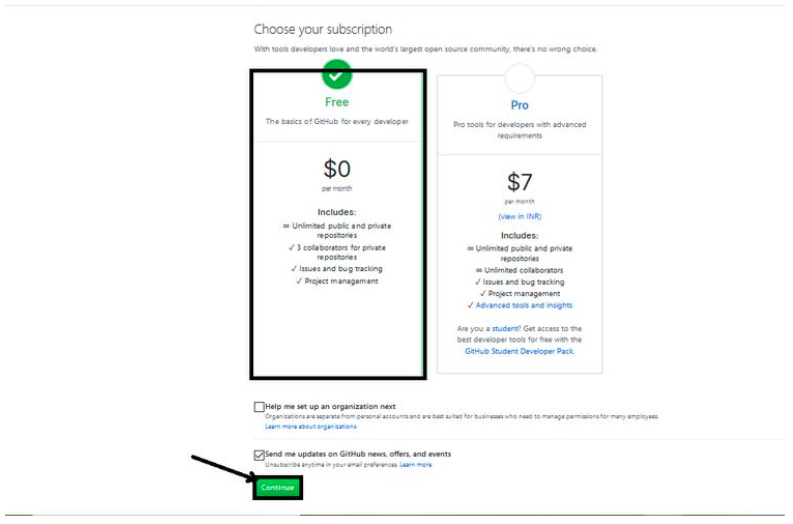
After completing the verification, it will ask us to choose a plan. We can either choose free tier or Pro according to our requirement. Here I’m choosing free tier and we have click on Continue.
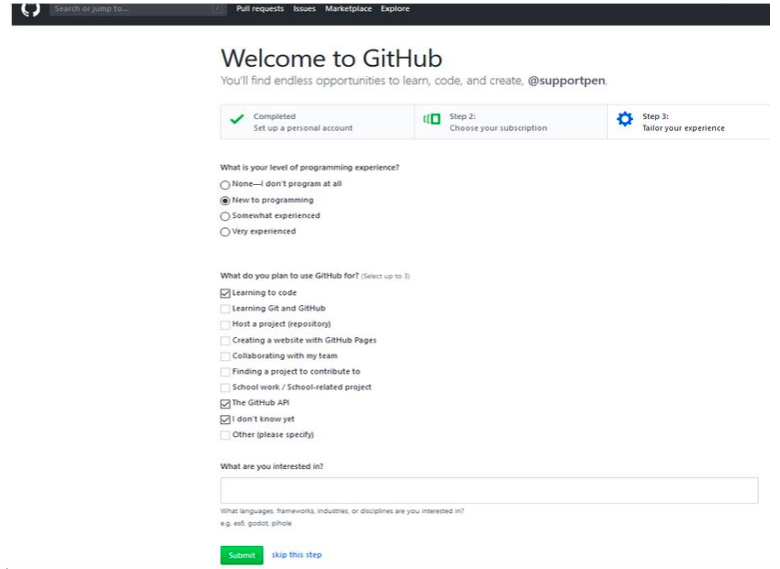
Fill in the required details and select the options as required by you as shown in the below screenshot and then click on Submit.
Once we click on submit, we need to verify our email address by clicking on Verify email address. It will send you the verification email address to complete the final few steps.

By clicking and verify the email address, it will take you to the next screen where you can create your own repositories.
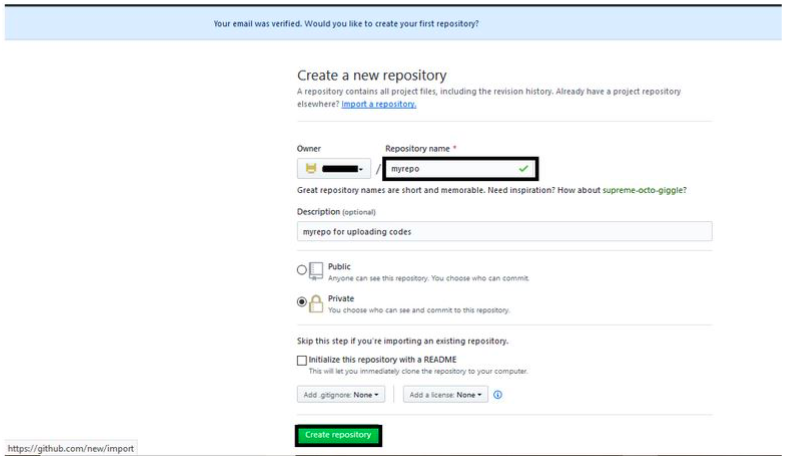
Give the name for your repository. The repository can either be public or private. For public repositories accounts are free, but there’s a charge for private repositories. Now, click on create repository and you can upload codes to your repo using the following set of commands.
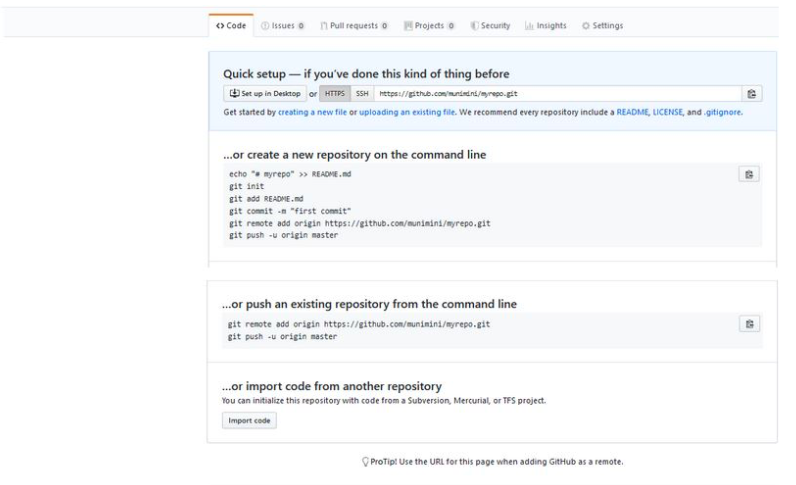
Step 4: Creating a repository in a local machine
While creating a new project on your local machine using git, you’ll first create a new repository (or often, ‘repo‘). Now change into the directory where you have your project. To initialize a git repository, run the below command.
# git init
|
Step 5: Adding files to the Repository
Add or edit files to the project. Once you’ve added or modified files in a folder containing a git repo, git will notice that changes have been made inside the repo. But, git won’t officially keep track of the file so in order to save the changes to files in the git repo, run the following command.
# git add *
|
The above command will add all the changes which we have made in the repo.
Step 6: Creating a commit and pushing to the repo
We now need to commit the along with the message so that we can identify it later with the message as shown below.
# git commit -m "Your message about the commit"
|
The message at the end of the commit should be something related to what the commit contains – maybe it’s a new feature, maybe it’s a bug fix, maybe it’s just fixing a typo. It will help to identify the commit easily. we’ll push the commit in MASTER of GitHub repo. This allows other people to see the changes you’ve made
# git push origin master
|
In case of pushing to the particular branch, you can use the following commands
# git push [email protected]:git/git.git yourbranchname # git push origin <yourbranchname> |
you can switch to particular branch using the command
# git checkout <branchname>
|
Step 7: Creating a pull request
A pull request (PR) is a way to alert a repo’s owners that you want to make some changes to their code. It allows them to review the code and make sure it looks good before putting your changes on the master branch.
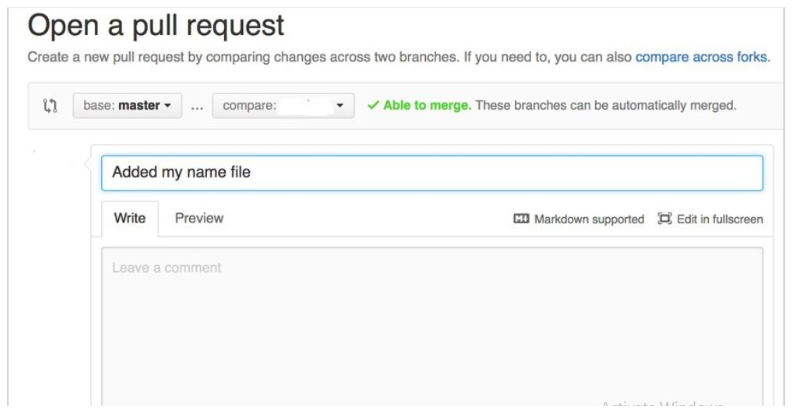
it looks like once you’ve submitted the PR request
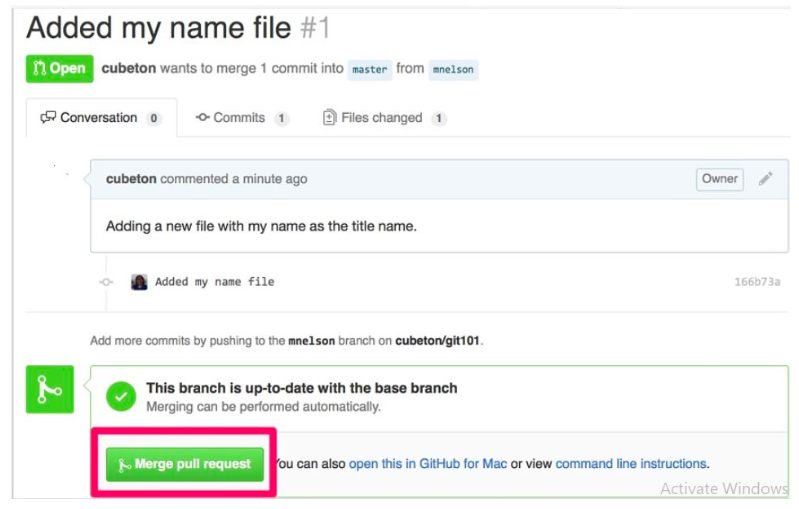
The Merge Pull request icon at the bottom of the screen will be in green if we don’t have and conflicts with the codes in the master branch. And if there is any conflict, it will appear in Grey color, in order to rectify the conflict we have to manually mention Git which version to use.
Step 8: Merging pull Request
To Merge the changes to the Master Click on Merge Pull Request icon as shown:
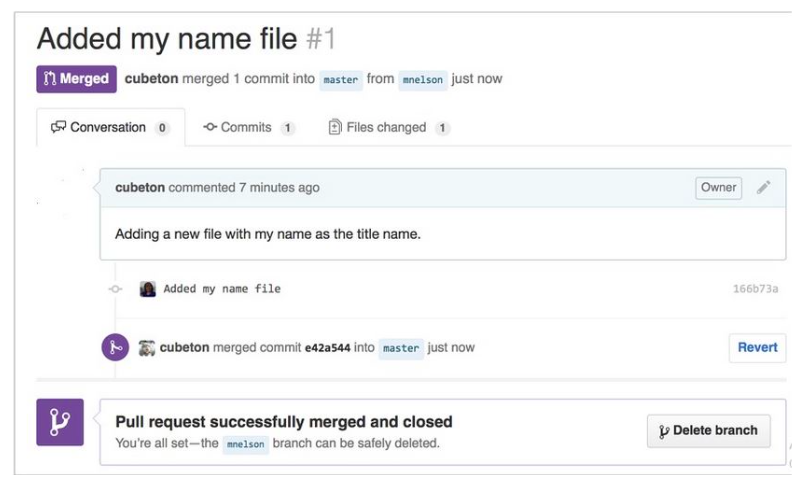
It’s strongly recommended to have the minimum number of branches so delete the branch once you have done commit the changes and merged with the master branch.
Aspired to become an AWS DevOps Engineer? Go through our complete guide on how to become an AWS DevOps Engineer and get ahead towards a bright career.
Final Words
So, here I’ve shared all of my knowledge on Git and the steps for the installation and configuration of Git in the Linux system. As I’ve already mentioned, you can use the same process for any of the Linux distributions. So, I’d strongly recommend you to use Git tool to manage the project’s source code history efficiently. Try this process now and share your experience in the comment section below.
In case you face any issues while implementing the above steps for the installation and configuration of Git in the Linux system, feel free to ask me by putting the comment below.


